 |
| My little guy strutting his stuff in his dashing Easter outfit. |
Okay, So far I have made a pattern for a 12mo. and 18mo. size.
Here is the printable I designed after the rough sketched pattern I used in this tutorial.
You will need:
- either size of pattern cut out.
- heat fusing material-My mother in-law gave me the fusible stuff w/out packaging as far as I can tell it is this stuff:Thermoweb 101306 Heatn Bond Li (Google Affiliate Ad) or this at amazon.
- a onesie with hemmed sleeves- not the undershirt style w/ serger edges (12-18mo. for this pattern)---Pre-wash and dry to minimize issues w/ shrinkage)
- Scrap fabric
- Thread that coordinates with fabric
- Sewing machine (although I guess you can do it by hand if you're into that)
- Fabric scissors
- pen or pencil for tracing
- an Iron and ironing board
1. Lay the pattern piece under your fusible webbing. Trace the inner tie shape from the pattern on the material. Cut out webbing material. It should fit within your pattern like this.
2. Lay the same pattern piece over your scrap fabric. I like to cut on a diagonal (like real ties). I just lined the lines up with the bottom angle of the pattern. Trace around the pattern with pen or pencil. If you're worried about show thru use a fabric pencil.
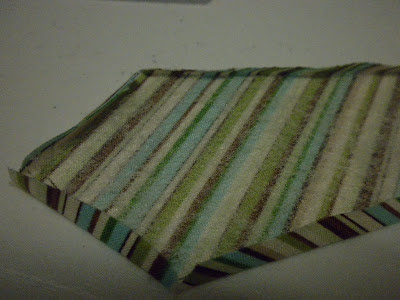
3. Cut out your fabric pattern piece. Using your iron fold the fold allowance (since it's not really a seam) toward the backside of the fabric and press. Turning under all raw edges. Lay the fusible web cut out inside it on the backside of the fabric. Do Not touch your iron directly to the fusing material! I did this when I carelessly set down my iron. I had to scrape it off with a spatula and cut a new piece. (I shouldn't do this stuff late at night)
4. With your fabric bottom side up (as pictured above), take your hot iron and carefully fuse down just the folded edges so they stay in place (this step is not pictured but is really helpful).
5.Then place the tie on the onesie. Lay it out flat on your ironing board. I put it right below the neckline hem and eyeballing it put it in the center of the belly. Run the hot iron over it melting the fusing material between the tie and the shirt. This hold it in place for stitching.
6. I have some fancy stitches on my machine. I think a dainty blanket stitch is functional and cute. You could do a simple straight stitch or a zig-zag (or both). I find my machine stitches much better if I keep it on the tie material otherwise the thin knit fabric pulls down and gets jammed underneath. Stitch all around the tie edges. I back-stitched a bit on each hard corner to keep any stray thread from fraying out.
7. After stitching clip your threads, inside and out. Run the iron over it one more time and it's ready to wear.
HAVE FUN! Let me know and/or send me some pictures if you try this.
 |
| This is a picture of my little guy wearing his 12-month onesie he got from mommy for Christmas. |


This is the first time I've attached a printable document, or put a "pin it" button on a post. Please let me know if these do not work.
ReplyDeleteI'm amazed that this is my most popular post, yet no one has commented. I would love to hear from all my readers. I need to make a digital copy of my 3-6 mo. size pattern. I gave one to my sister at her baby shower. I plan to make her one in each size so my soon to be nephew will always have something comfortable yet stylish to wear to church.
ReplyDeleteThis is lovely, made one for my son today and with this tutorial
ReplyDeleteThat's awesome! Were you able to print the pattern and everything? They are pretty simple to make. I should get busy and make a whole bunch of them at once to have on hand for gifts.
Delete