I'm doing a few of these projects this week.
Patchwork Fabric Eggs: Blow out the eggs and these eggs will last forever. My mom has some that are decades old. The glue and fabric make them really strong. I did these ones below. We did some using Elmer's glue (thinned) and an off-brand Tacky-Glue. Avoid the tacky glue because the fabric sticks to your hands too much... if you add lots of water it might do okay and they did have a more transparent affect. I used both simple cotton fabric and flannel (see the ladybug egg). It gives a little different texture (note: the flannel absorbs more glue).

See my post on Patchwork eggs with tips on making different patterns
Silk Tie-Dyed Eggs : I've done this for a few years. It's awesome.
I saw a tip on using a colander to hold blown eggs in the bottom of the pot (but you need an enamel coated or non-metal colander). I didn't have that so we wrapped our eggs in silk and then cotton, and twist tied them. Then we put them in a garment bag w/ 3 salad plates (for weight). We simmered for 20 minutes.


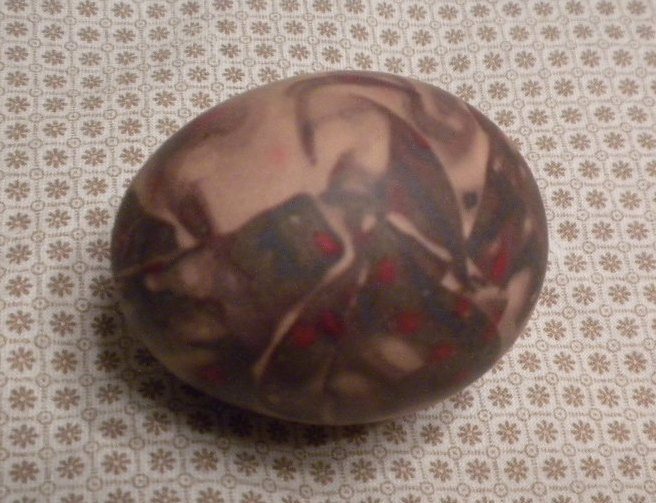 |
| here is one silk dyed egg. Most of the ties I found didn't transfer very well. |
Watercolor eggs: Made a few of these. This is the most like traditional egg dyeing. Next time I plan to hold my blown egg w/ a wood skewer through the middle and dilute my water colors with vinegar so they stain the egg. After letting them sit for awhile rinse them off. W/ just regular watercolor the color rubs off the egg (it doesn't soak in like it does on paper).

Shaving cream Swirl Eggs (This was passed around on Facebook not sure where it's from)

1. Spread cheap white shaving cream in a cookie sheet
2. Apply drops of neon food coloring across surface
3. Use toothpicks to swirl colors around
4. Roll the dried, cooled hardboiled eggs in the colorful cream (we used disposable kitchen gloves to reduce the tattoo effect)
5. Allow to set for 3-4 minutes on a paper plate
6. Wipe off shaving cream with paper toweling
7. Rinse! Voila! Beautiful marbleized eggs, done quickly!
 |
These are the marbled eggs we did. The girls who did the project with me took the nicest ones. I used farm fresh beige and aqua colored eggs. I think the beige ones didn't look as bright. We wiped the eggs down w/ vinegar (so the color will stain) before we put them in the 9x13 full of marbled foam. We coated them, then put them on cooling racks over newspaper to set for 1/2 hour or so. Then I took the racks to the sink and hosed them off with the faucet sprayer.
Let me know if you try these and how they turn out. Especially if you come up with some handy tips.
Happy Easter!
-DIY-Mom

How fun!! My kids will love this :)
ReplyDeleteThanks for letting me know. I love comments. It's nice to know people actually read my blog, and I love hearing that they actually want to try things that I share.
ReplyDelete